
Resources are materials and tools you can push to participants through their wellness platform. Common types of Resources are calculators, articles, and URLs (for example, a life insurance website). There are many ways for participants to use Resources. QRM Admins can add, edit, and remove Resources.
Creating a Resource
To create a new resource, first navigate to Content Config > Resources. Click on '+ Create Resource'.

This will open a form that allows you to create your resource:
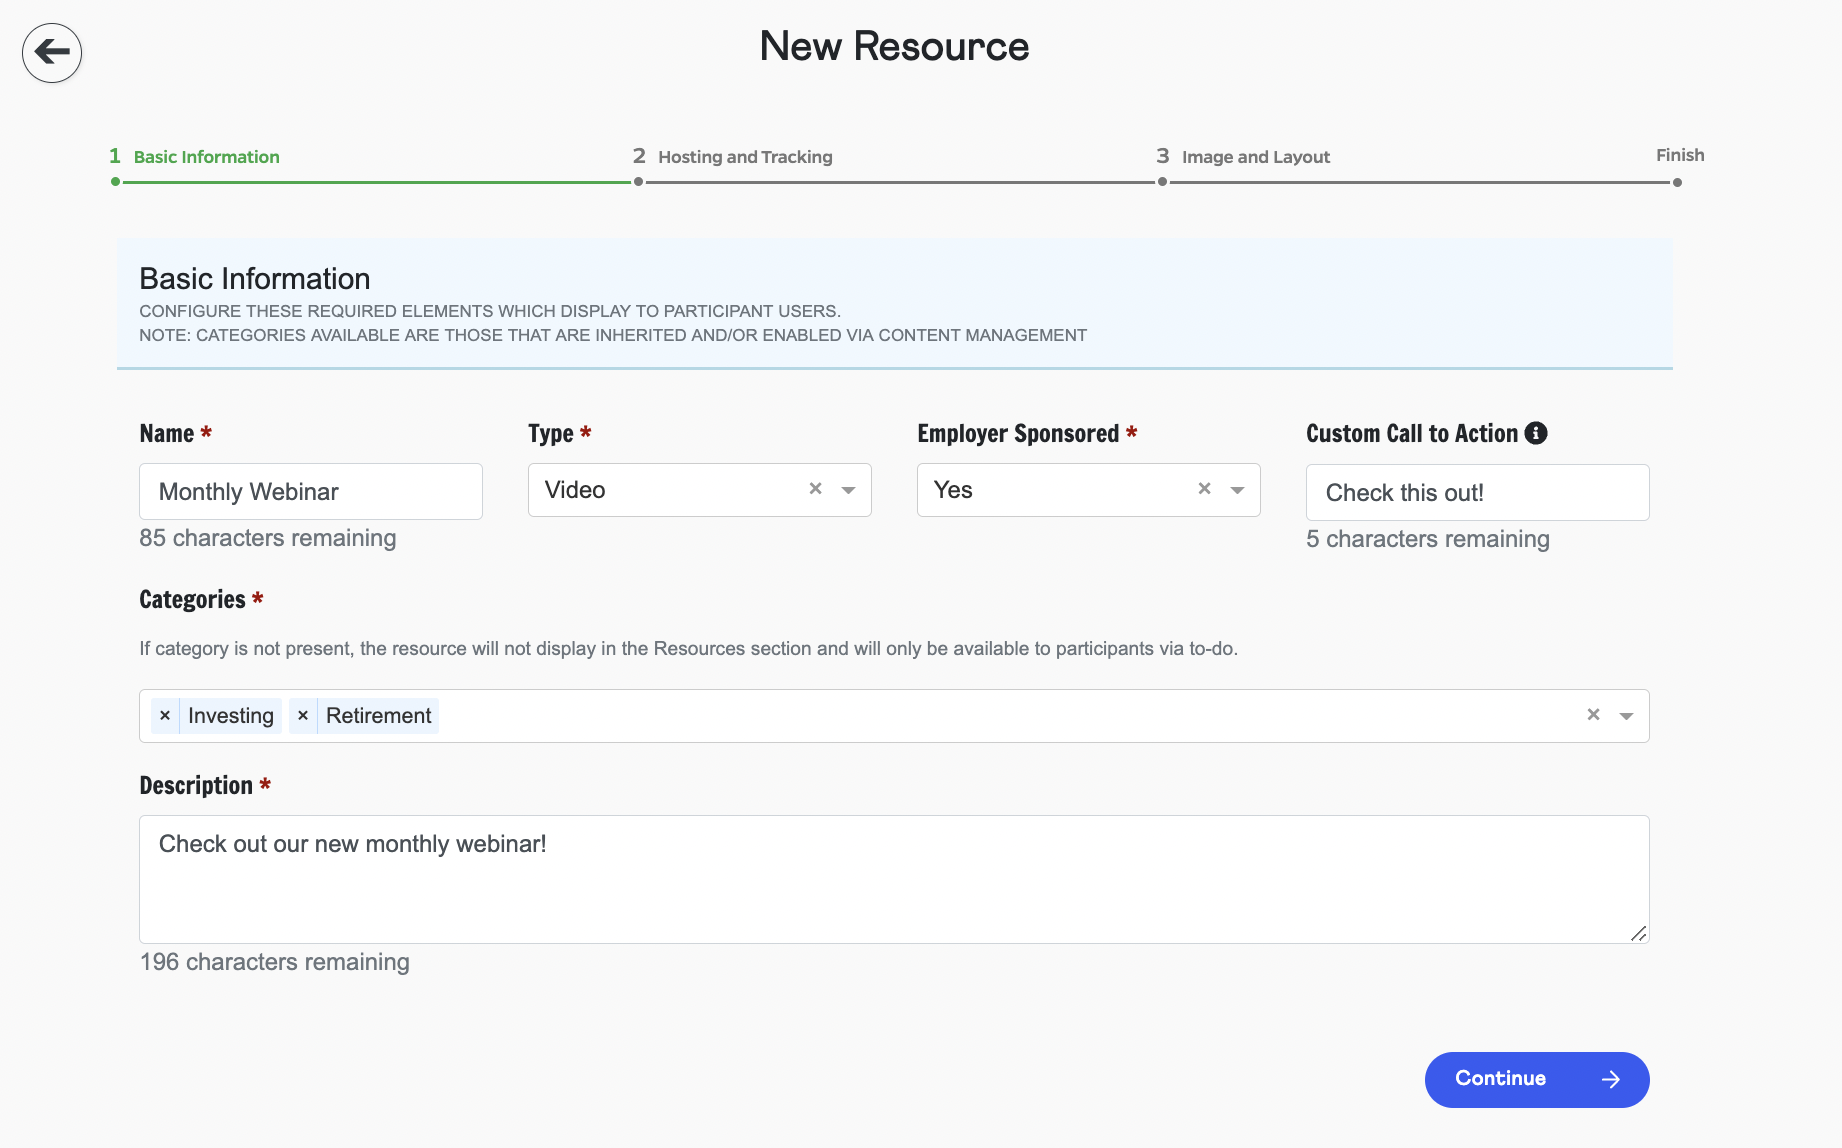
Fill in a resource name and select the type of resource. (Note that calculators will automatically be shown with a calculator icon.)
Choose whether or not the resource is employer sponsored - choosing 'Yes' will add an 'Employer Sponsored' banner to the top of the resource card.
You can optionally add a custom call to action. If you do not customize the call to action, it will default to 'Learn More'.
Select a category that the resource will fall under and add a description, then click 'continue'.
In the hosting and tracking section, add the target URL, file, or multiple files that will make up your resource.
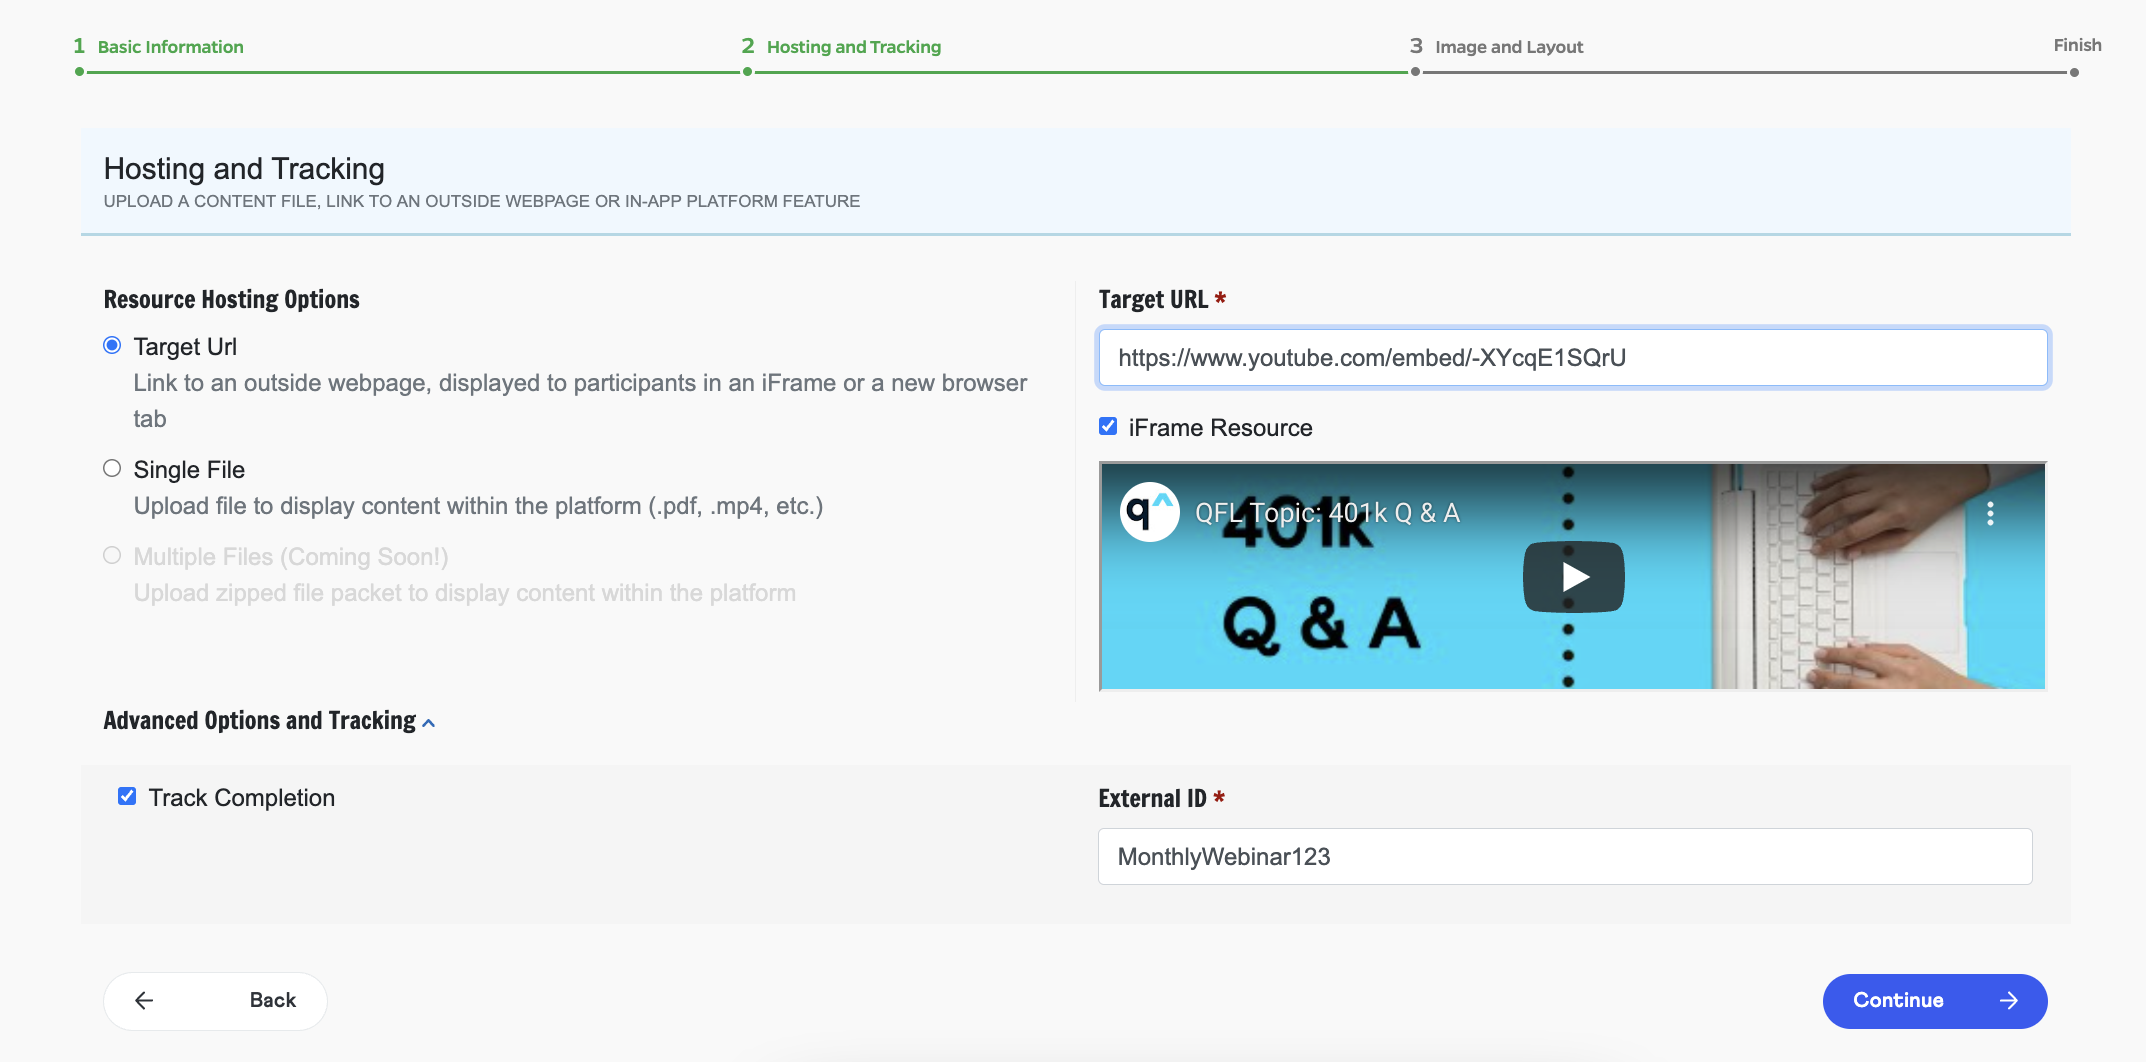
If you would like this resource to be tracked on the Resource Tracking Report, be sure to expand the 'Advanced Options and Tracking' section and check the box next to 'Track Completion'. Add an external ID (this can be made up of letters or numbers) and click 'continue'.
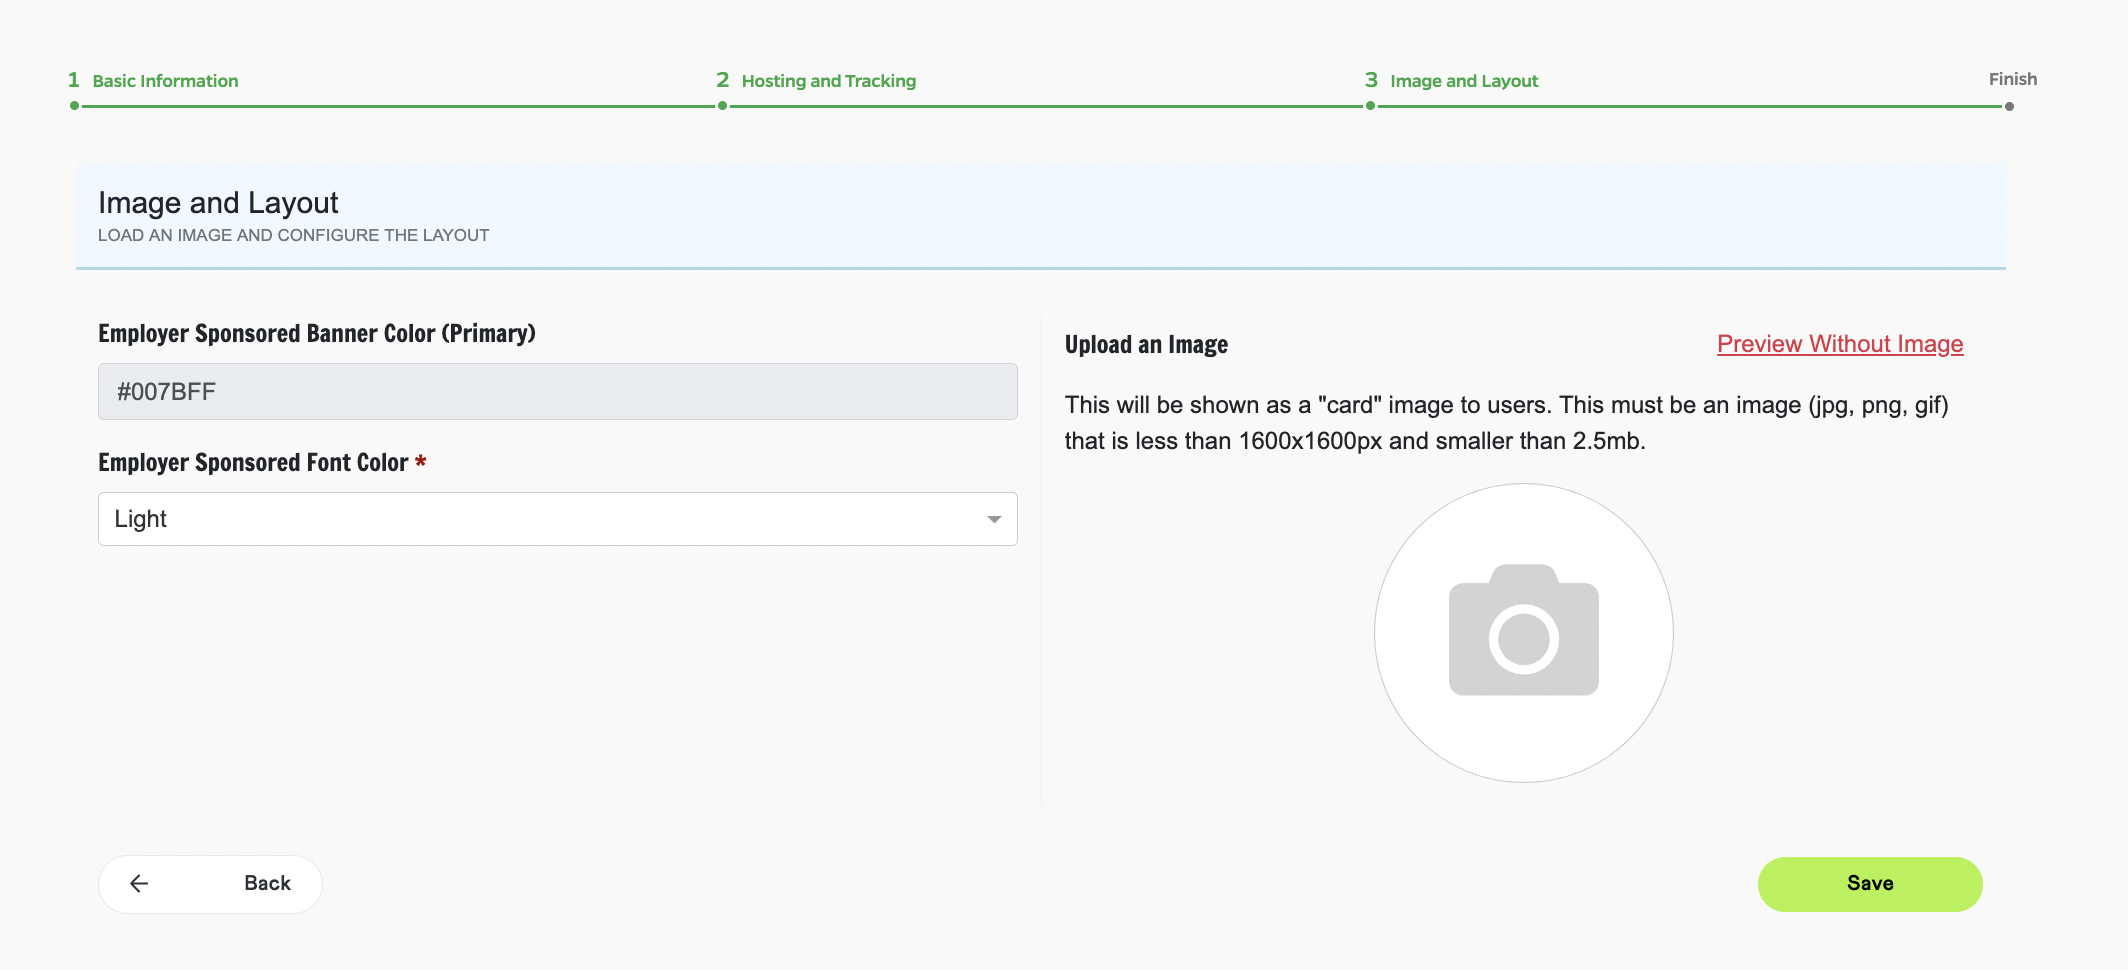
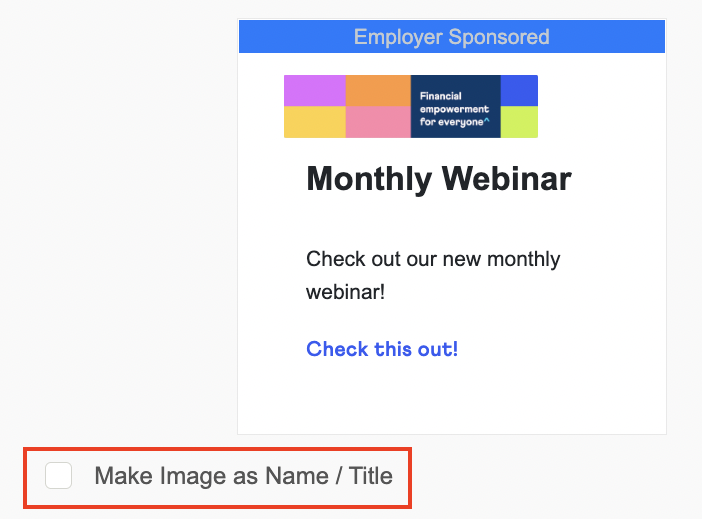
The final page of resource creation allows you to adjust how the resource will display to participant users. If the resource is marked as employer sponsored, you can decide whether the 'employer sponsored' text will display in a dark or light color. (Click the preview link to see how it will look to the end user!)
If you add an image, you will have the option to make this image logo sized (default) or use the image as a title card in place of the resource title. To use the title card option, check the box next to 'Make Image as Name / Title'.
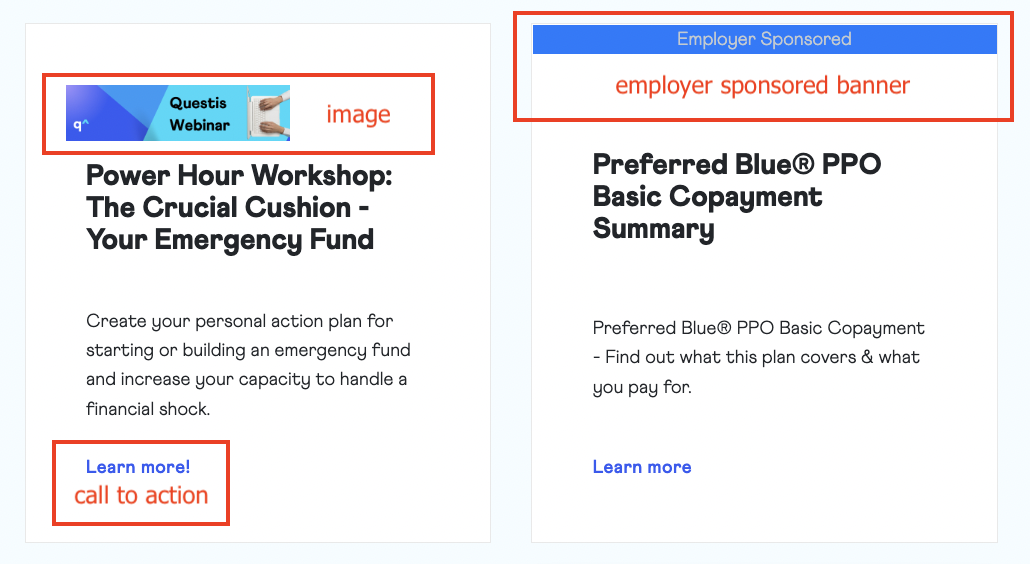
 |
 |
Click 'Save' to finalize your resource.
Editing a Resource
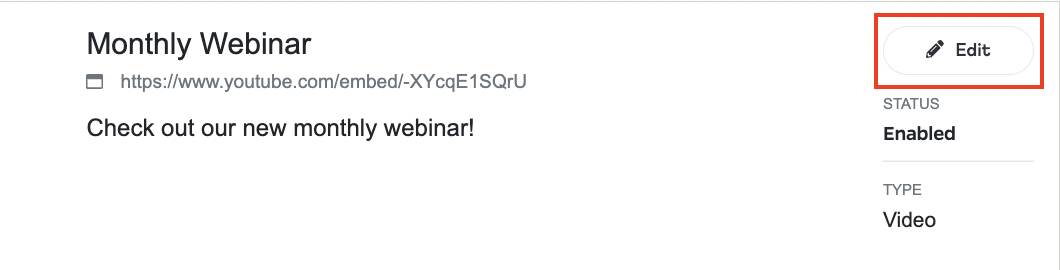
To edit a resource, just press 'Edit'. Remember to scroll all the way through the resource details and save any changes you make.
Questis default resources cannot be edited, only disabled. For more information, email support@myquestis.com
Deleting a Resource:
To Delete a resource, first select 'Edit' and then click the trash can icon. It will have you click again to confirm the resource deletion.
Disabling/Enabling Resources:
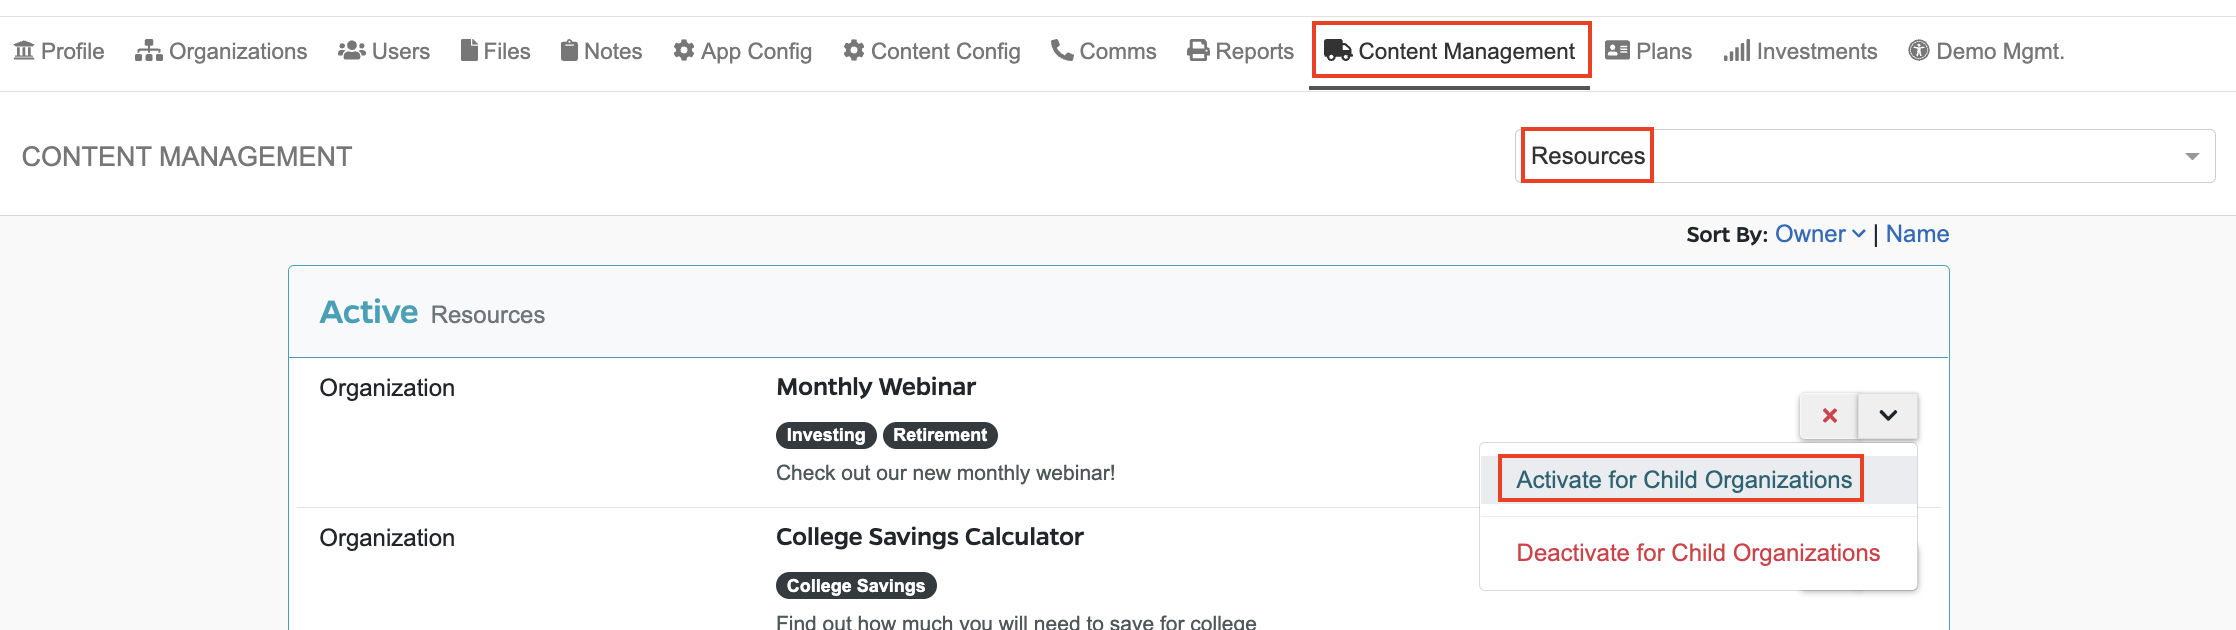
Resources can be inherited, enabled, in the Content Management tab.
To do so, select 'Resources' from the drop down menu and find the resource you wish to enable/disable. Click the down arrow next to the resource, followed by 'Activate for Child Organizations'. (or 'deactivate' if applicable)
Select your desired organizations and click 'Activate' to confirm. (or 'deactivate' if applicable)
Comments
0 comments
Please sign in to leave a comment.